

A ruffler foot can save you loads of time when there’s a lot of gathering involved in your sewing project. To save even more time, I’ll share different settings on your sewing machine and ruffler foot and the corresponding gather ratio of fabric.
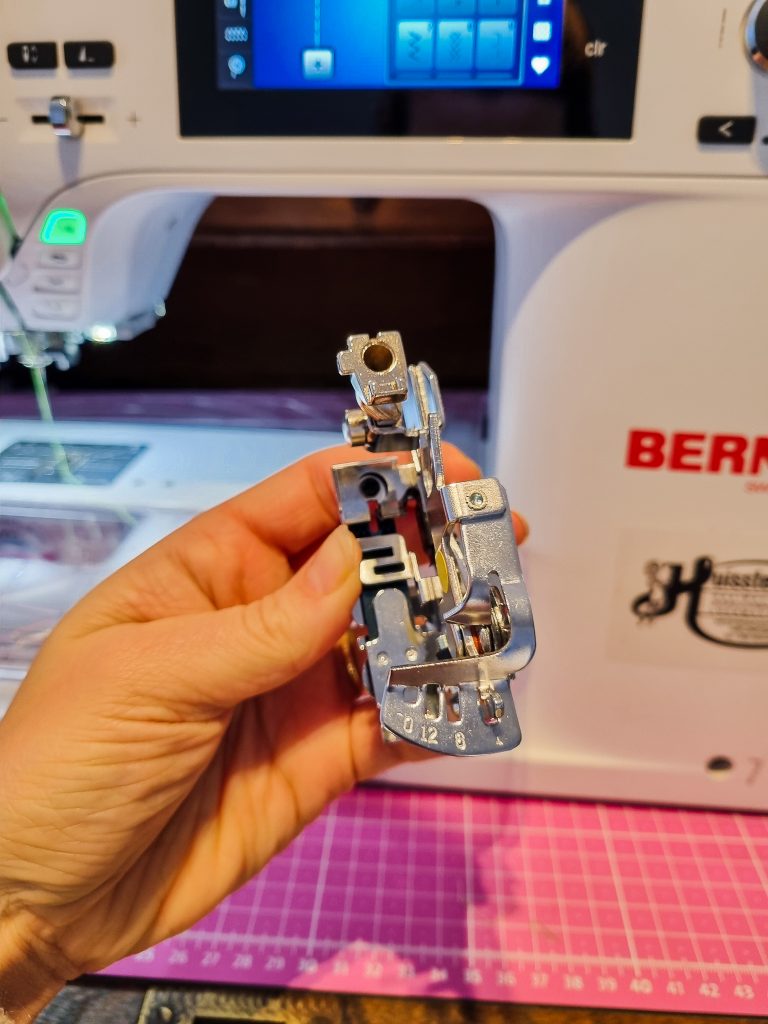
You know you’re a sewing addict, when you ask a ruffler foot for your birthday. That’s me! They’re quite expensive, especially the Bernina 86 ruffler foot I had my eye on. I know there are cheaper versions of generic brands out there, but in this case I didn’t want to take the risk of ending up with ill fitting quality. Those Bernina Swiss know how to make durable sewing equipment.
Gathering by hand versus ruffler foot
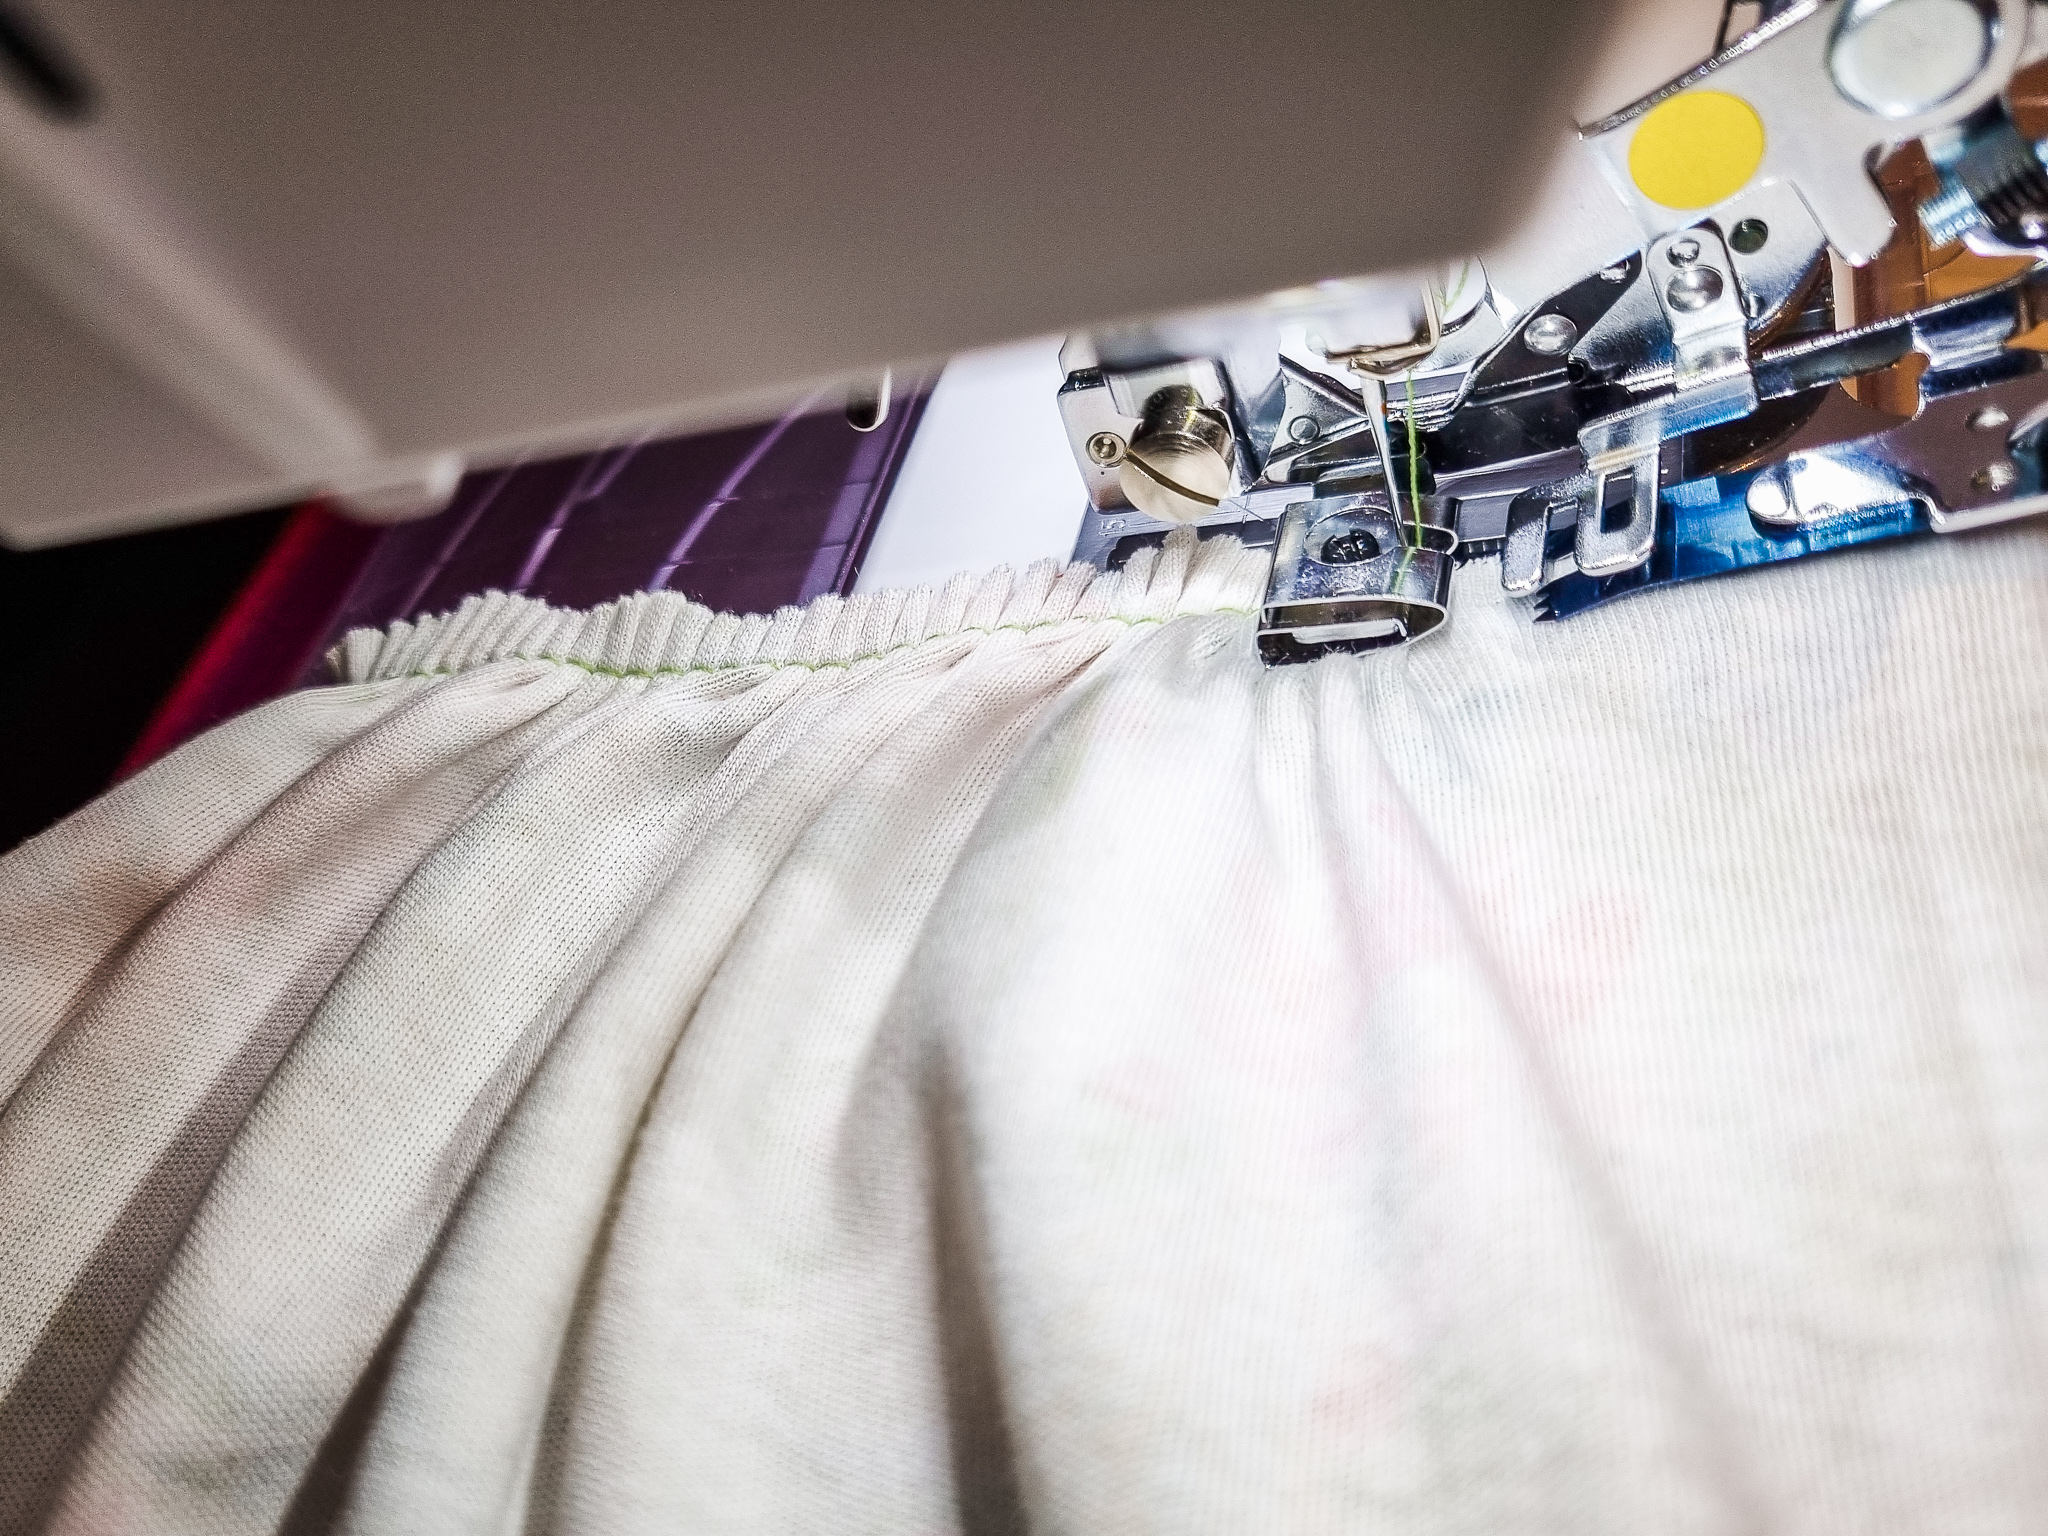
If you’ve never seen a ruffler foot before, you’re in for a treat. It looks like some antiquated add on for a plow. But once you get the hang of it, it’s a great time saving companion. Another great benefit of a ruffler foot are the nice and even pleats it creates.
Normally you gather fabric manually with two rows of stitching with the longest straight stitch length. You then pull the bobbin threads resulting in fine gathers. It’s an easy method, but it can be time-consuming to get those neat even gathers. Especially when you have multiple ruffles on your sewing project. Hence: the ruffler comes in.
Ruffler versus gathering foot
To be clear, a ruffler foot is different from a gathering foot which produces gentle gathers. The gathers produced by a ruffler are actually little pleats. And then there’s the difference in size. As I mentioned earlier: a ruffler is rather big due to it’s multiple options. A gathering foot looks like a regular all-purpose presser foot, but gathers fabric through the shape of the foot. You can see the difference clearly in these two videos.
Ruffler foot:
Gathering foot:
Adjust depth and frequency of pleats
In this blog I won’t explain how the ruffler foot works, since this is already explained in the video above. All you need to know is that when using a ruffler, you have three options to make adjustments:
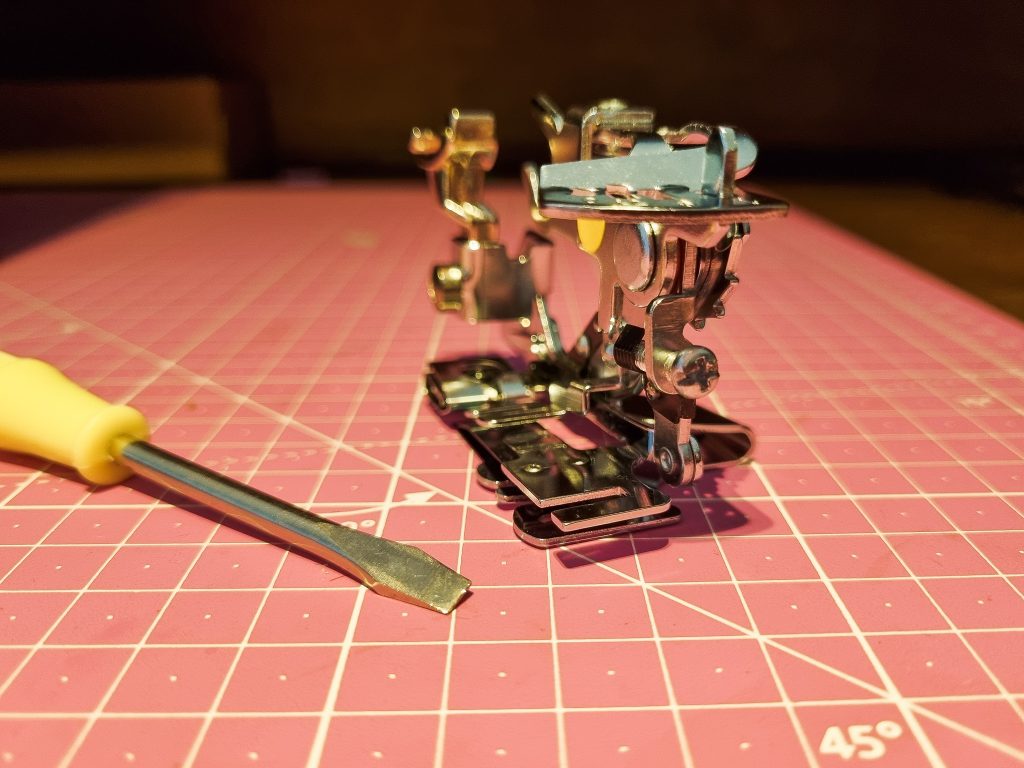
- Number of pleats: On the front of the ruffler foot you’ll see four settings: 0, 12, 6, 1. This tells how many stitches there are between each pleat or gather. So 12 means every 12 stitches the rufflers creates a pleat.
- Depth of pleat: With the screw on the front of the ruffler, you can adjust the pleat depth. You need a little screwdriver for this. When you turn the screw counterclockwise, the pleats become more shallow. Turning the screw clockwise means deeper pleats.
- Stitch length: With the ruffler foot on 6, a stitch length of 4 will give larger ruffles, but also fewer ruffles than a stitch length of 2. Smaller stitches means getting more pleats at the sixth stitch.
Gather ratio of the ruffler foot
What I was missing in the information online was which gather ratio followed different settings of the ruffler foot, pleat depth and stitch length. Why is this important? For example: a pattern contains a gathered sleeve that needs to fit the sleeve cuff. If you want to ruffle the sleeve quickly with your sewing machine, you need to know the right gather ratio. You can do this by testing different scraps of fabric. But you don’t want to do this every time. At least I don’t.
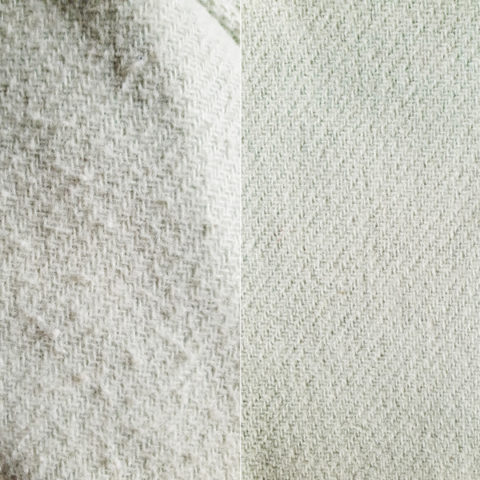
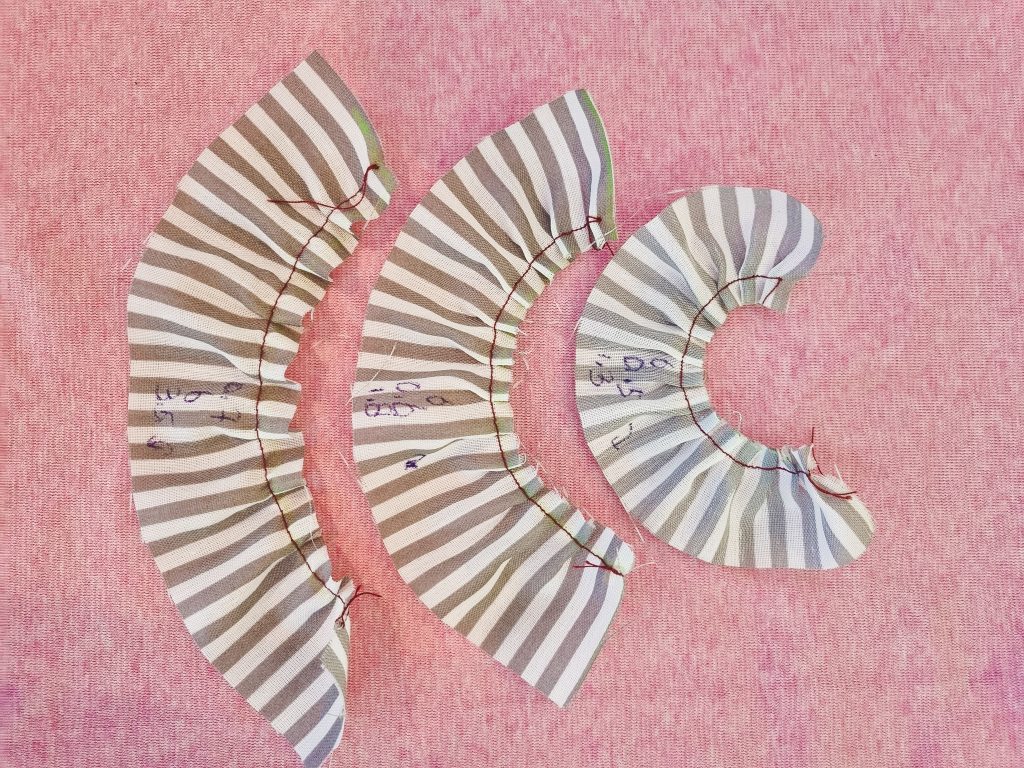
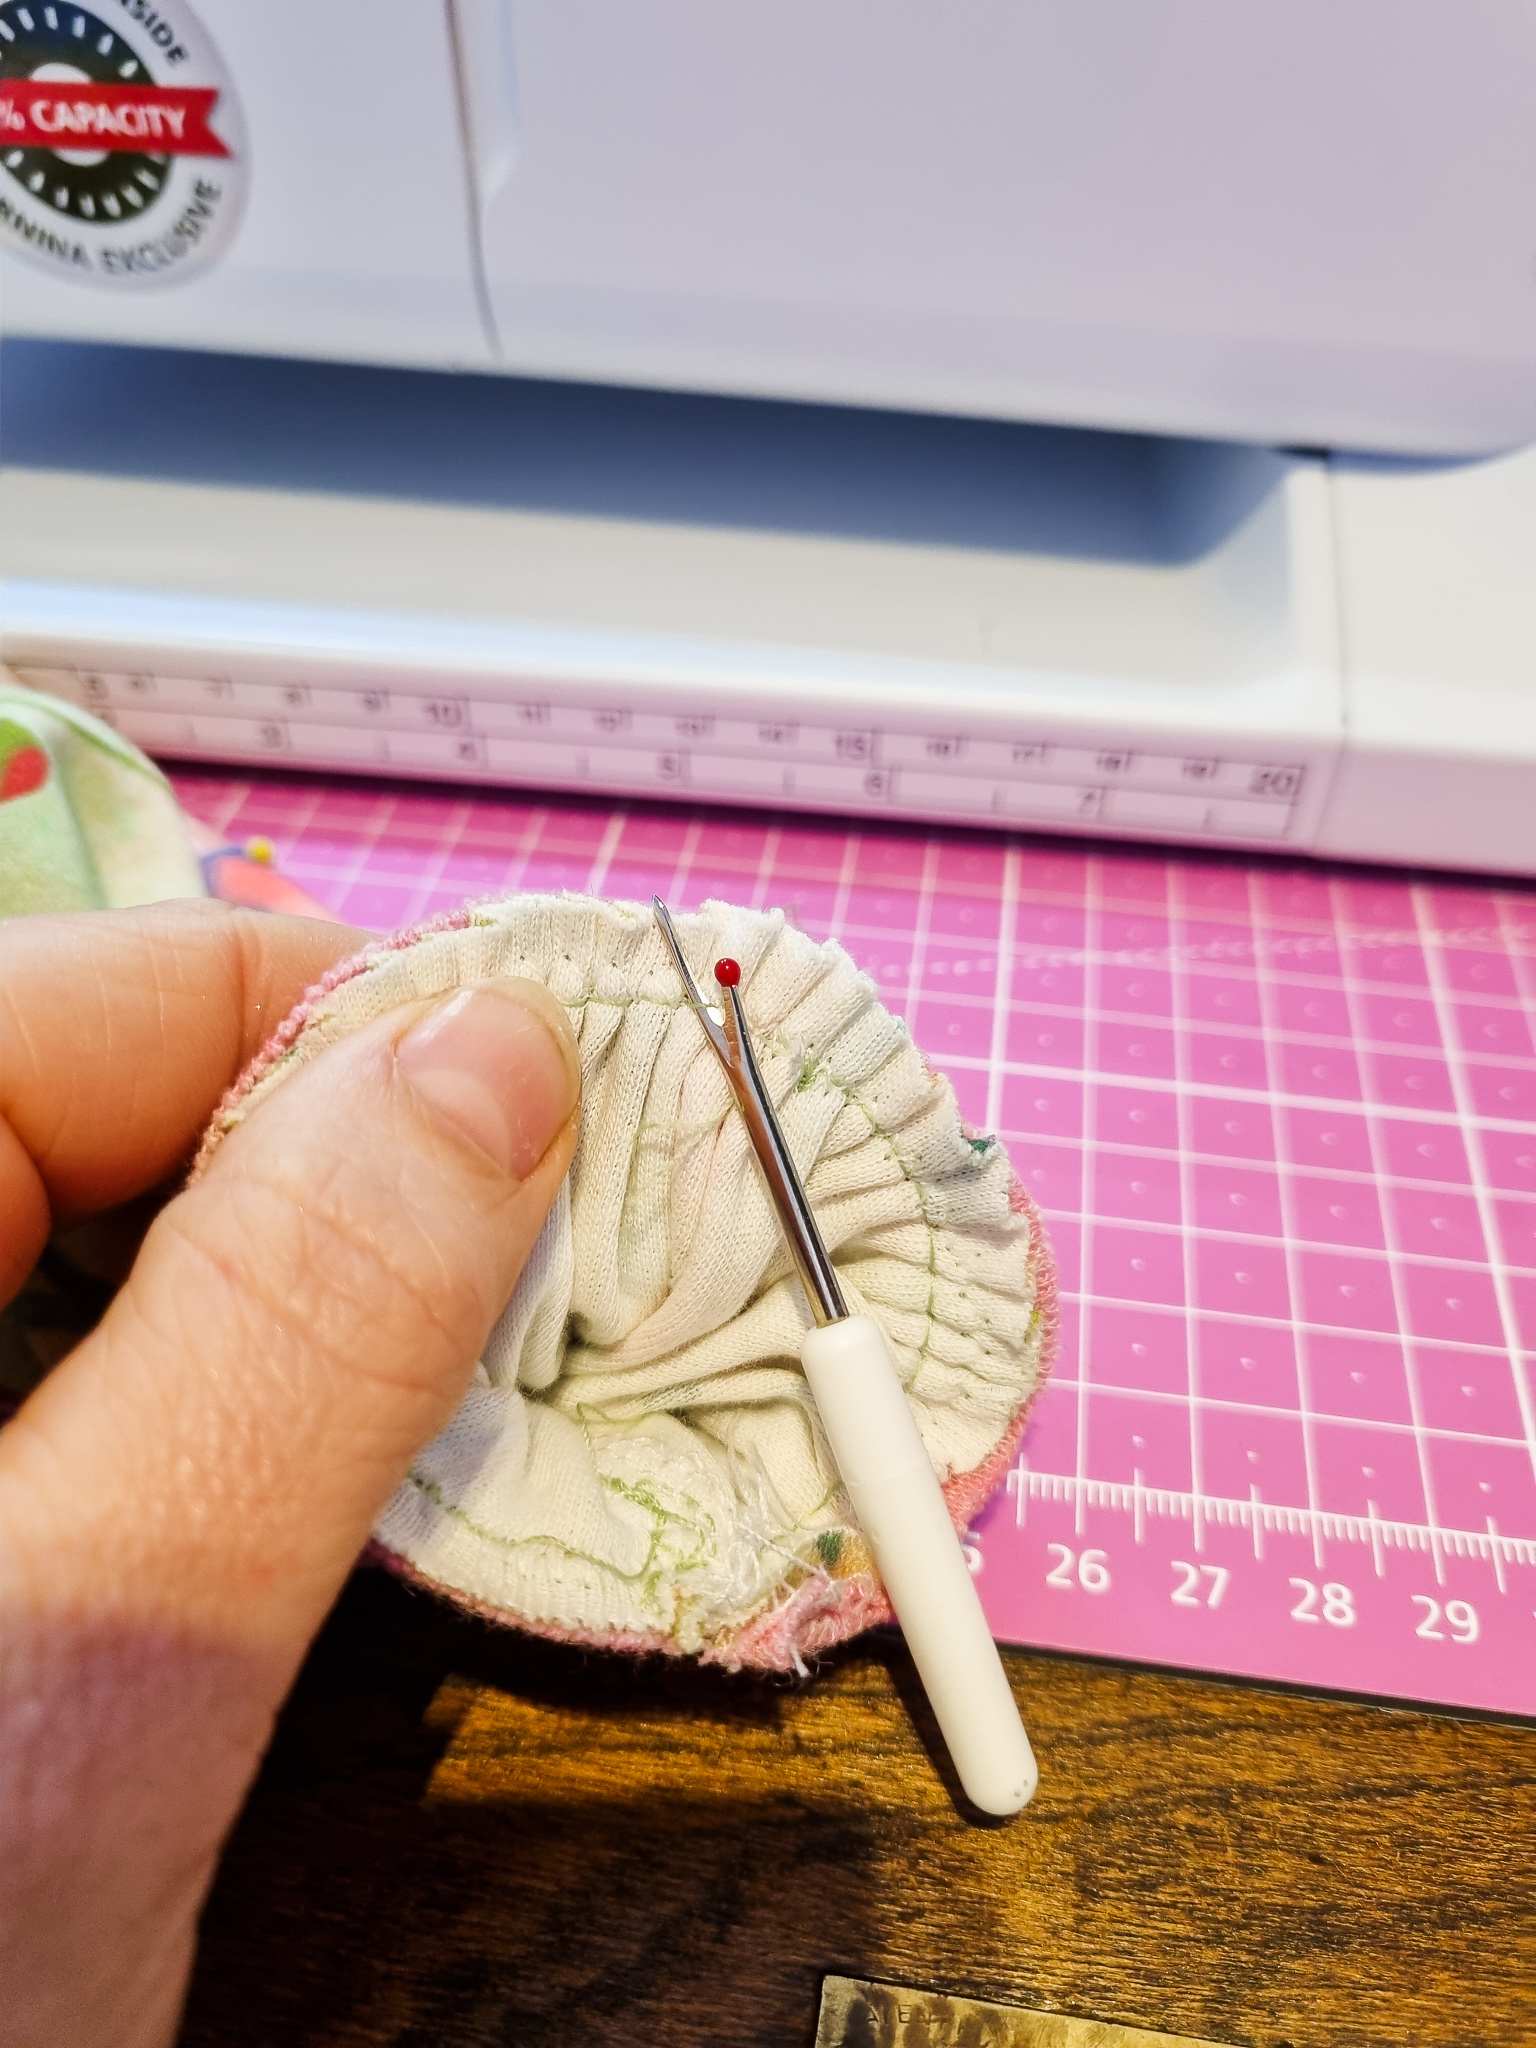
So that’s why I’ve been figuring out different gathering ratios in a very nerdy study. I cut several pieces of fabric with a length of 20 centimeters and ruffled them up with different settings. Then I noted down the settings and gather ratio.
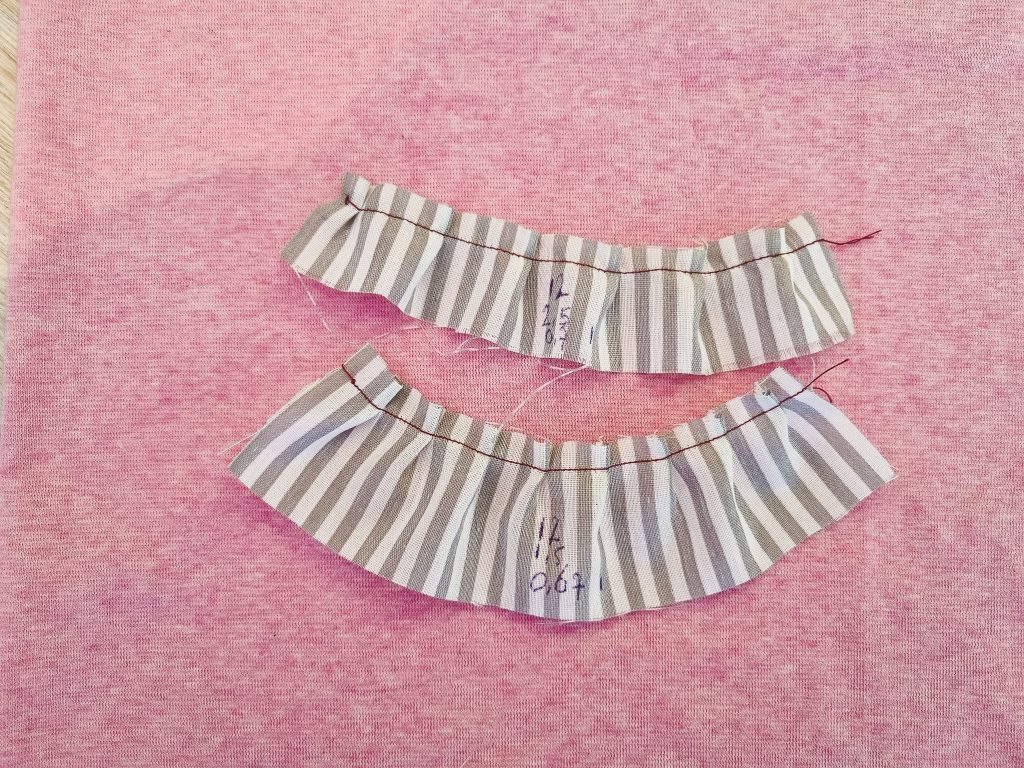
Here you see the following settings from top to bottom:
Ruffler foot: 12
Screwdrive: in the middle
Stitch length: 2,5
Gather ratio: 0,7
For example: 100 cm of fabric with this setting will get me 70 cm of gathered fabric. When I reduce the stitch length to 1.5, you get 0,67 cm of gathered fabric.
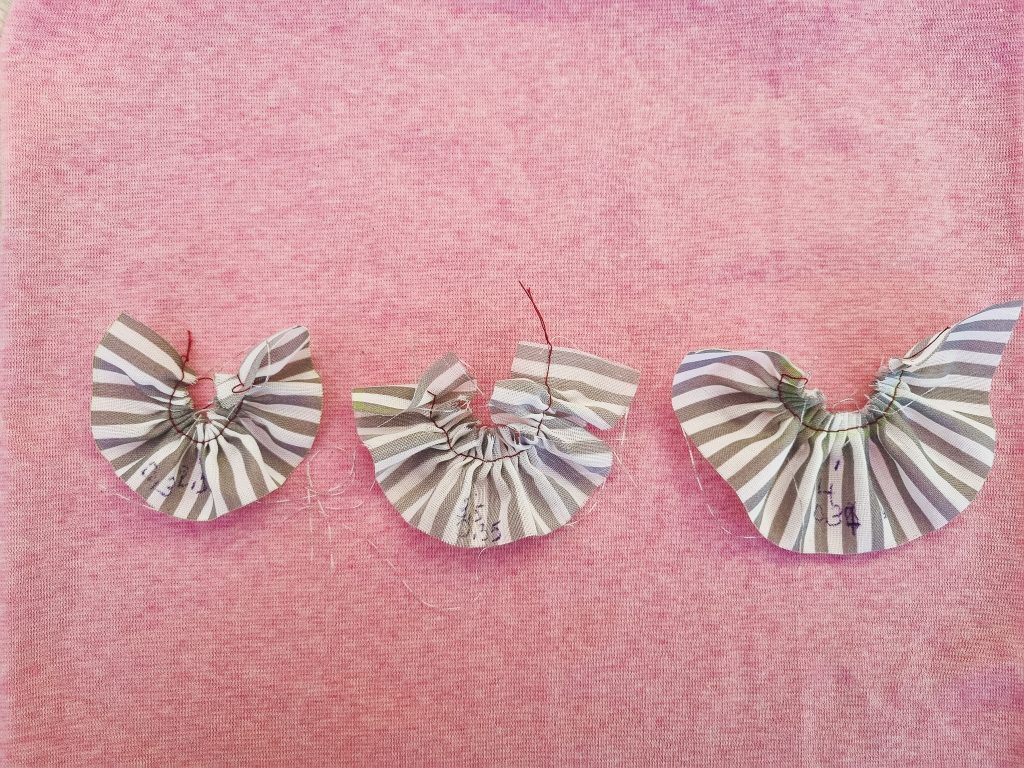
From left to right with the ruffler foot at 6:
Stitch length: 3,5
Screw: counterclockwise -> shallow pleats
Gather ratio: 0,7
Stitch length: 1,8
Screw: clockwise -> medium pleats
Gather ratio: 0,6
Stitch length: 1,3
Screw clockwise -> deep pleats
Gather ratio: 0,5
From left to right with the ruffler foot at 1:
Stitch length: 2,5
Screw: clockwise -> deep pleats
Gather ratio: 0,3
Stitch length: 3,5
Screw: in the middle
Gather ratio: 0,35
Stitch length: 4
Screw: clockwise -> deep pleats
Gather ratio: 0,37
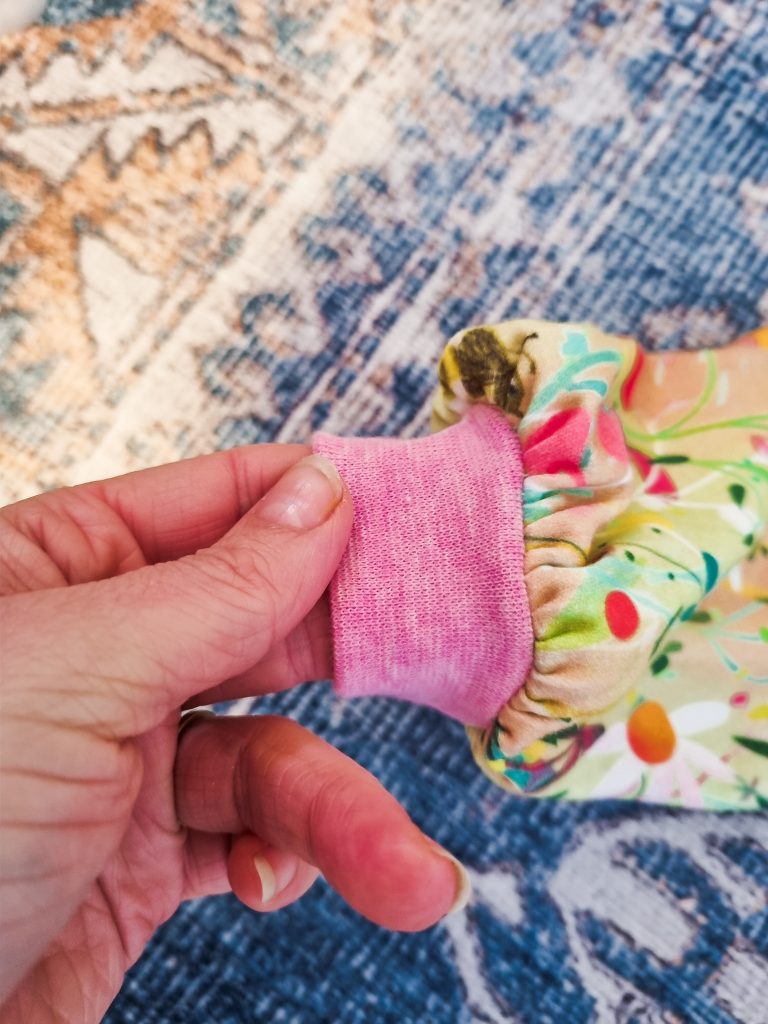
Make a gathered sleeve with a ruffler foot
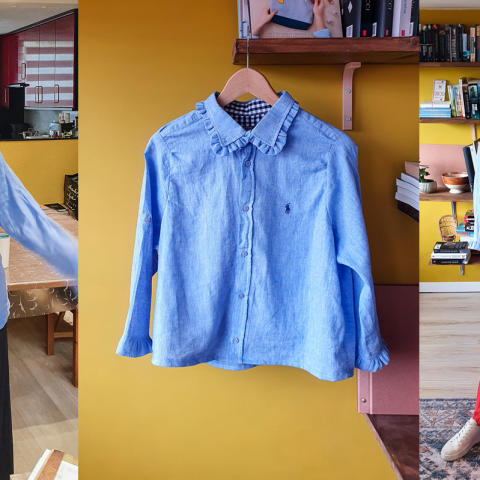
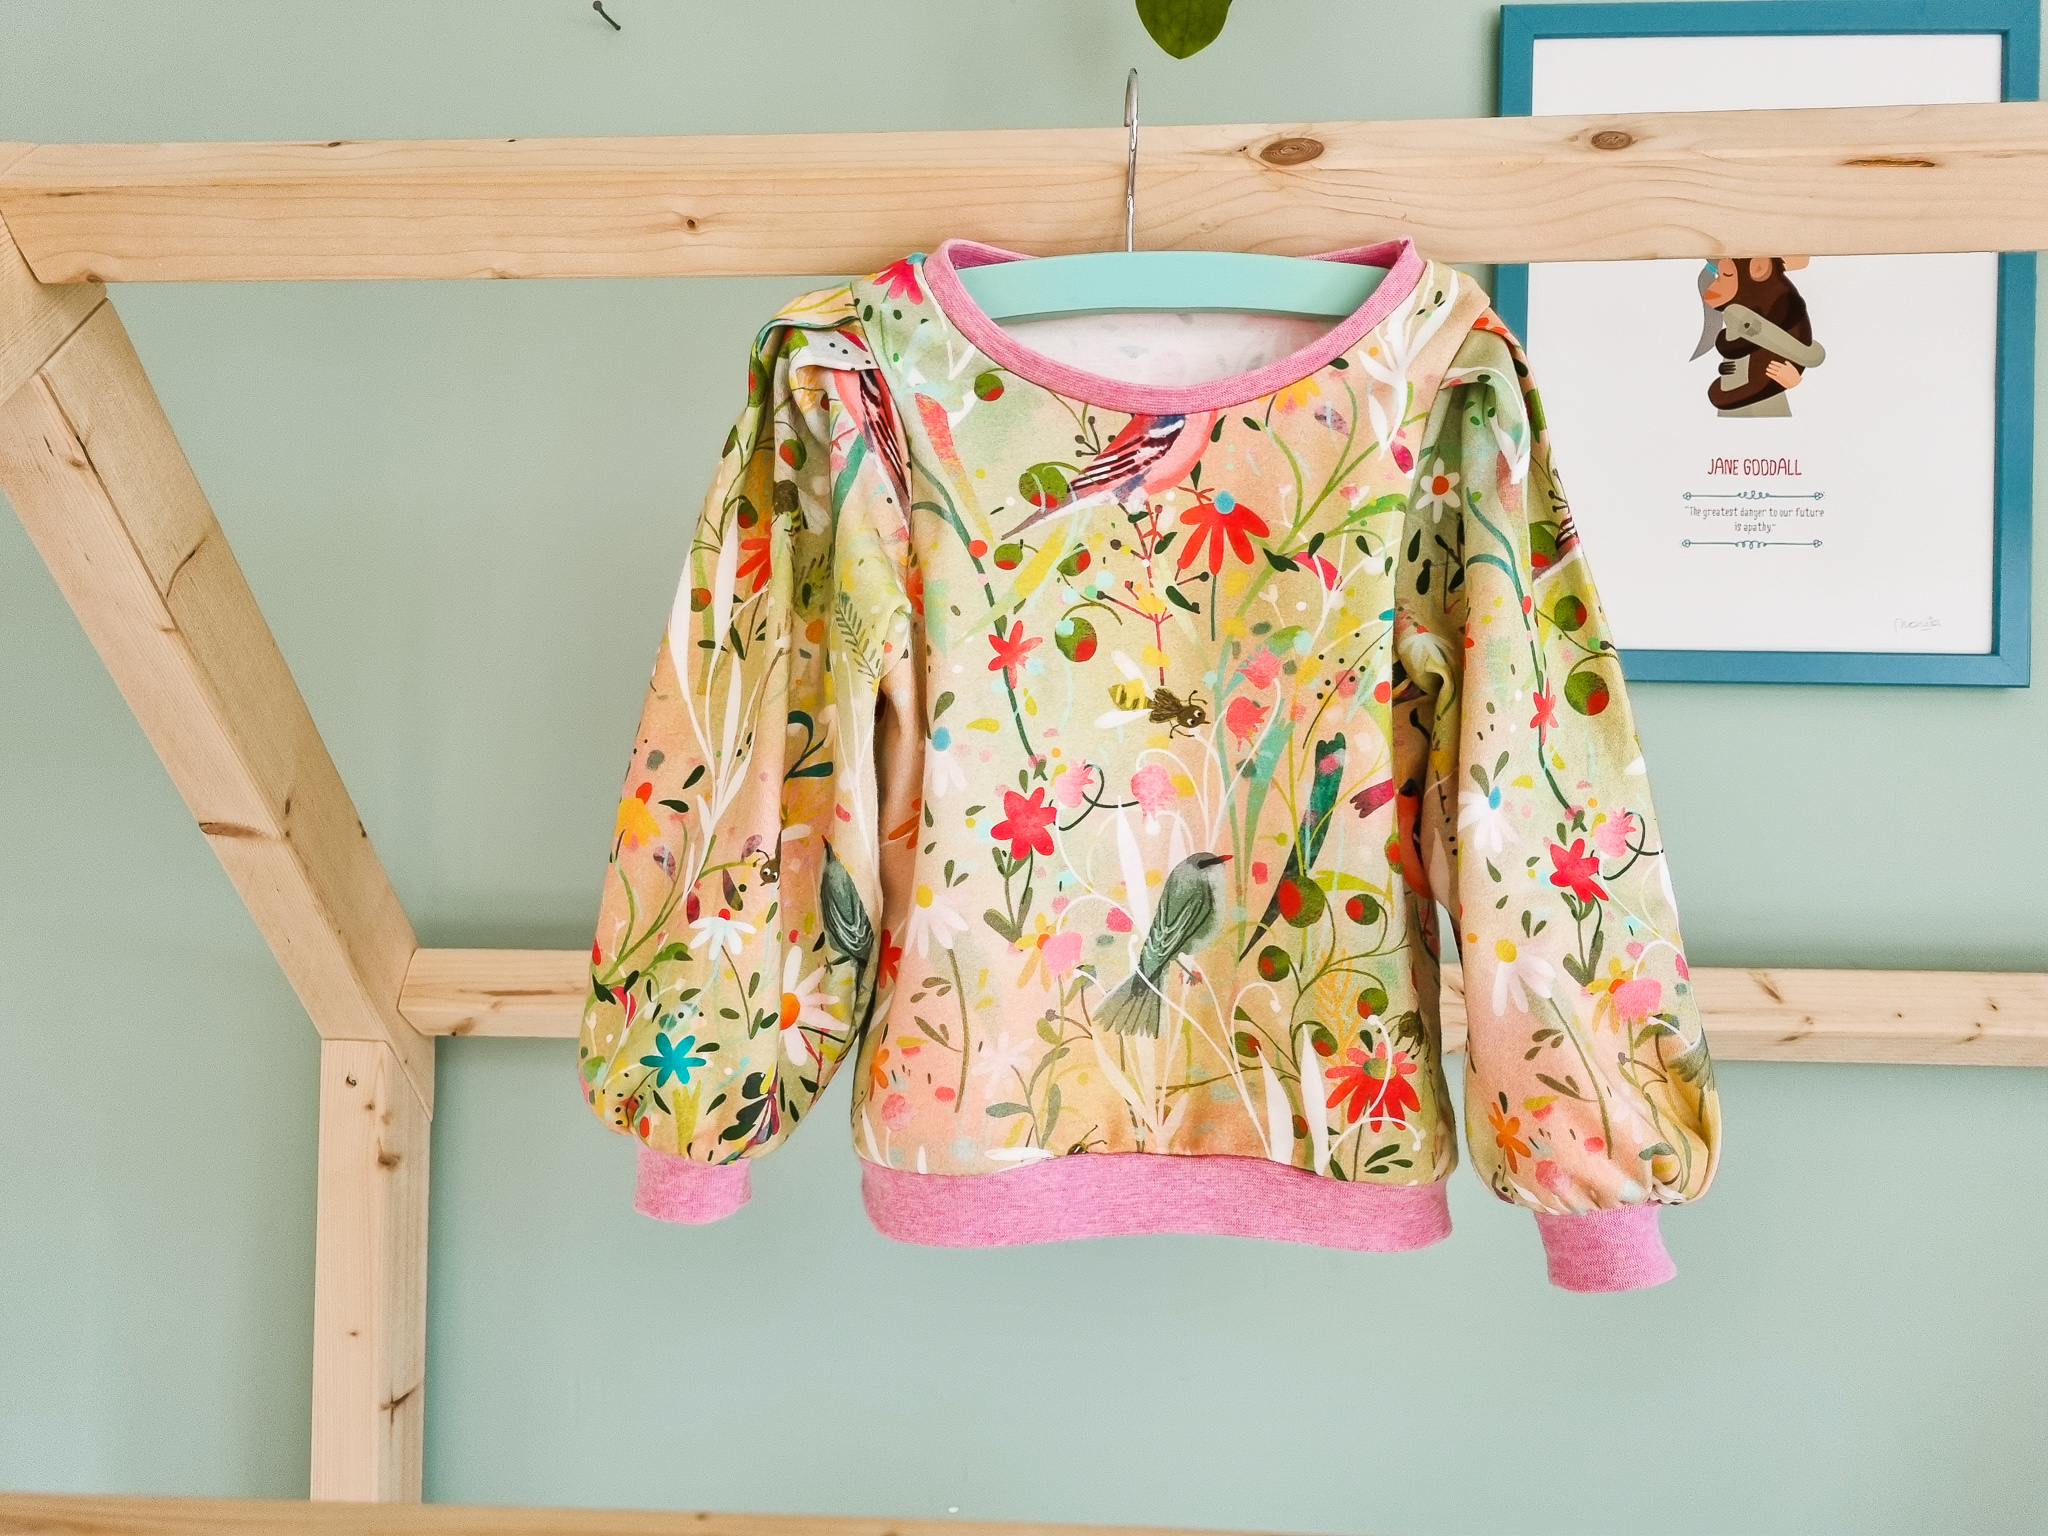
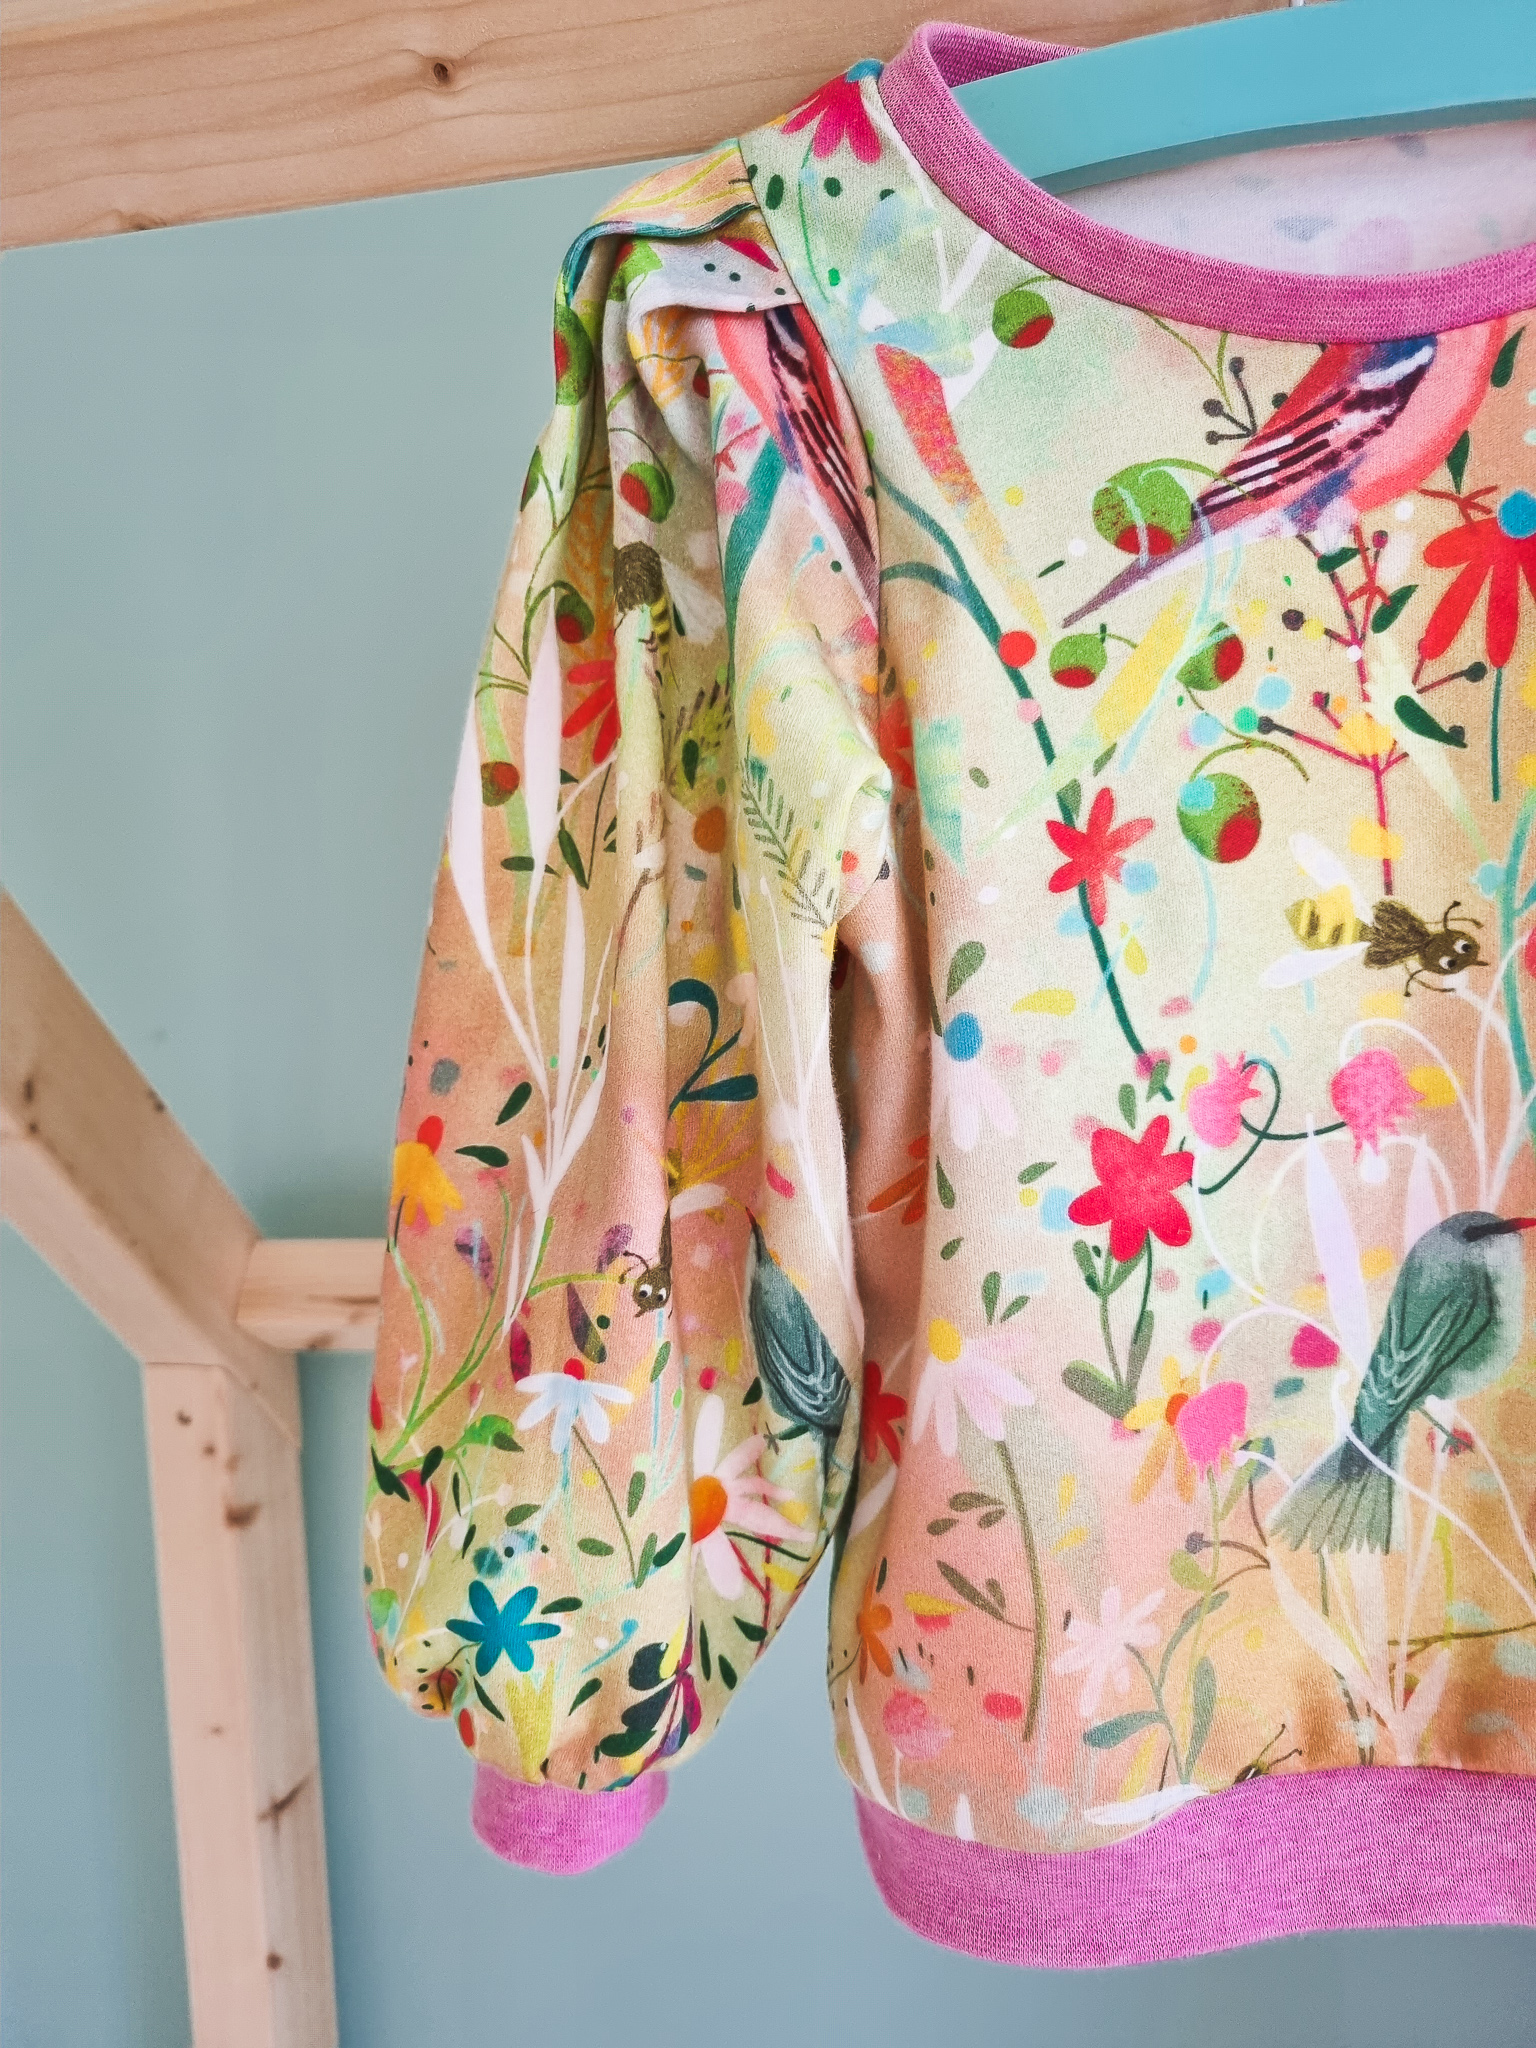
Now let’s bring this knowledge to the sewing floor! I was making the Jeanne sweater, a pattern by Iris May and (of course) I choose the version with the big puffy sleeves which requires gathering. A perfect opportunity to put my nerdy ruffler study to the test.
Sleeve = 33 cm
Cuff sleeve = 12 cm
12 cm : 33 cm = 0,36
This comes very close to the following settings: ruffler foot at 1, stitch length 4, deep pleats, gather ratio 0,37. 33 x 0,37 = 12,21 cm. I still have to stitch the sleeves so I leave some space for the seam allowance.

Using the right gather ratio, resulted in lovely evenly pleated sleeves that fitted the sleeve cuffs like a glove.
I hope you enjoyed this nerdy blog and use this knowledge for the good;)